This is the fourth post of a 4-Part series that will take you on a journey of Successful Digital Product Development.
Start reading from the first part here.
“Good Design is Obvious, Great Design is Transparent” – Joe Sparano
Now that we we have a clarity on the product definition and hence the product features, we move onto designing the product.
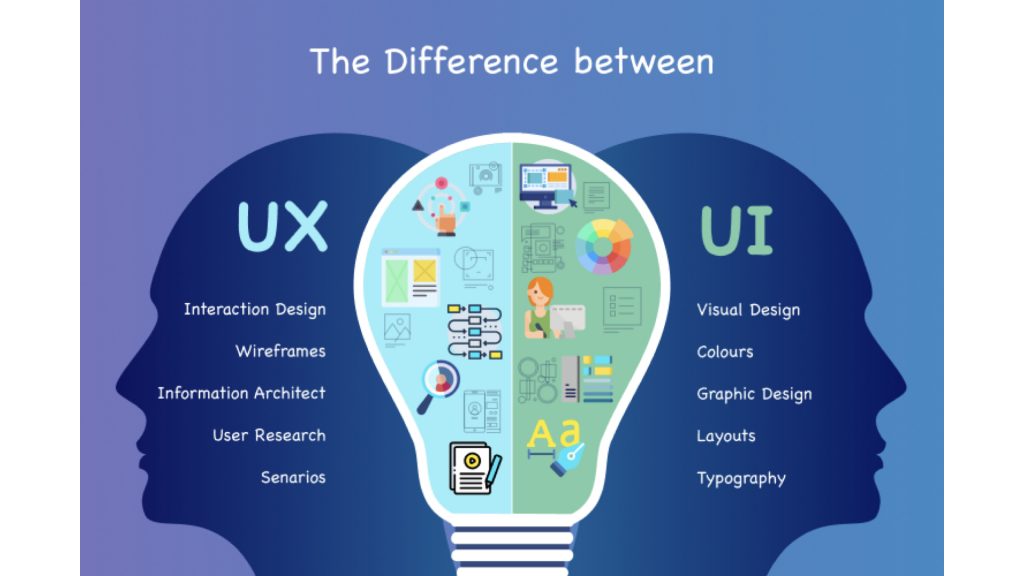
There are 2 components of product design – the UX and the UI. This visual provides a representation of the difference between UX and UI.
In short, UX design covers the user journey from the point of landing on the product to the point of signing out. UI design is about the aesthetics of the product – colors, fonts, buttons, images, animations etc.
In this article we will discuss some key steps / processes required to achieve great design – defining Roles, writing use cases and user stories, drawing task flowcharts and creating wireframes.
A. Roles – who will engage with the Product:
We start by defining various Roles that will engage with the Product. Each role has a different set of interactions with the product. In our earlier example of an email productivity tool, if we were building the product for a large enterprise then the roles could be – sales person, sales manager, head of sales, sales support, user admin, finance & billing etc. Or if this was a product targeted at individual users or small business, then the roles would only be sales person and admin. Here we see why it is very important to get precise answers to What, Who and Why or the product before we start designing it.
B. Use cases and user stories:
After we know the roles, we need to write the use cases and user stories for each role.
Use Cases are centered on the result and the benefit of the thing you’re describing, whereas User Story is more granular, and describes how your system will act. There can be multiple user stories around a single use case.
Lets illustrate this with an example from our email productivity tool use case…
Parent Use Case 1
I am a sales person in a large services company and I want to build a sales pipeline from my business emails.
Child User Story 1. a
I log into my app where I see my business emails categorized by Prospects. The app analyses my emails and identifies any new or progressing leads along with their respective sales value. The app allows me to directly add those leads to my salesforce account.
Child User Story 1. b
I can see trails of my past interactions with an individual person or company, along with all documentation shared with them. The app automatically extracts the follow-up action items, and lets me delegate those to respective stake-holders.
Child User Story 1. c
I can add my personal notes to client interactions and save them for future reference.
Normally you would have 2 to 5 Roles, 1 to 3 Use Cases for each Role and 3 to 5 User Stories for each Use Case.
5 Roles x 3 Use Cases x 5 User Stories = 75 Product Journey Flows
As we see in the example, if we don’t define the product scope tightly (the 3 Ws from the previous article), we end up with a massively complex product that no one would find easy to use.
C. Task flowcharts:
After the user-stories are clear, each user story needs to be visualised with the help of task flowcharts. These task flowcharts can be sketched by hand on plain paper or drawn using any of the online tools. Eg. figma is a handy tool for the same.
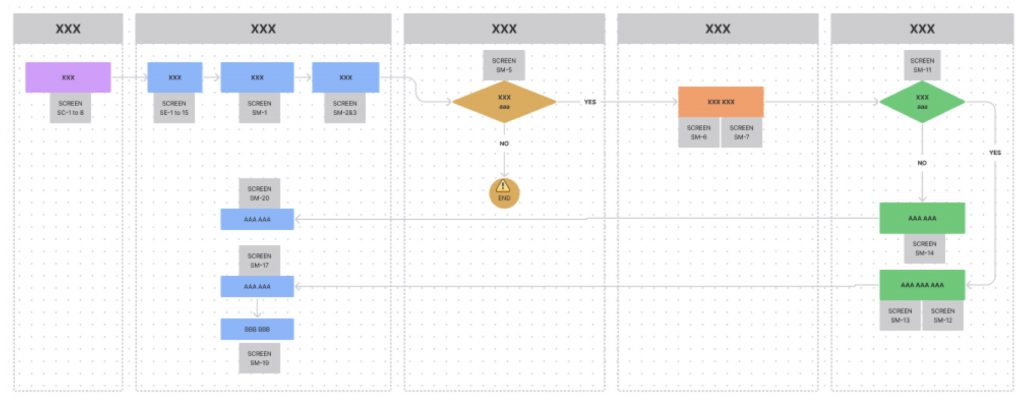
These task flowcharts help all stakeholders to understand the user journey at a high level. It also enables engineers to build the underlying database structures and to conduct quality testing of the code after the algos have been written.
D. Wireframes:
The UX designer then starts creating wireframes for each user story. This is a very detailed process in which each screen is visualised in depth. Every functionality, every element of interaction with other screens, every button and every outcome is sketched down. We can think of a wireframe as a black-and-white sketch of the actual interface.
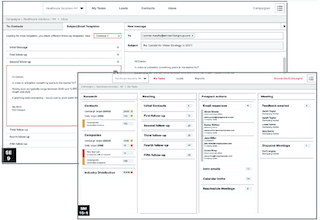
This works best when there are daily brainstorming sessions between the UX designer, the engineers and the product manager. At Least once a week sit-down with the business function is also required. That ensures alignment of thoughts and emergence of new ideas during the design process. This also ensures that there are no last minute surprises for anyone.
This process of wireframing could take anywhere from 1 to 3 months, depending on the complexity of the product. The UI / aesthetics of the product are shaped after the wireframing is completed. These UI templates are then used to write the front-end code for the product.
In this article we will not go into the subject of what defines a good design. Here we are only addressing the processes that are needed to be followed to achieve good design and build a great product.
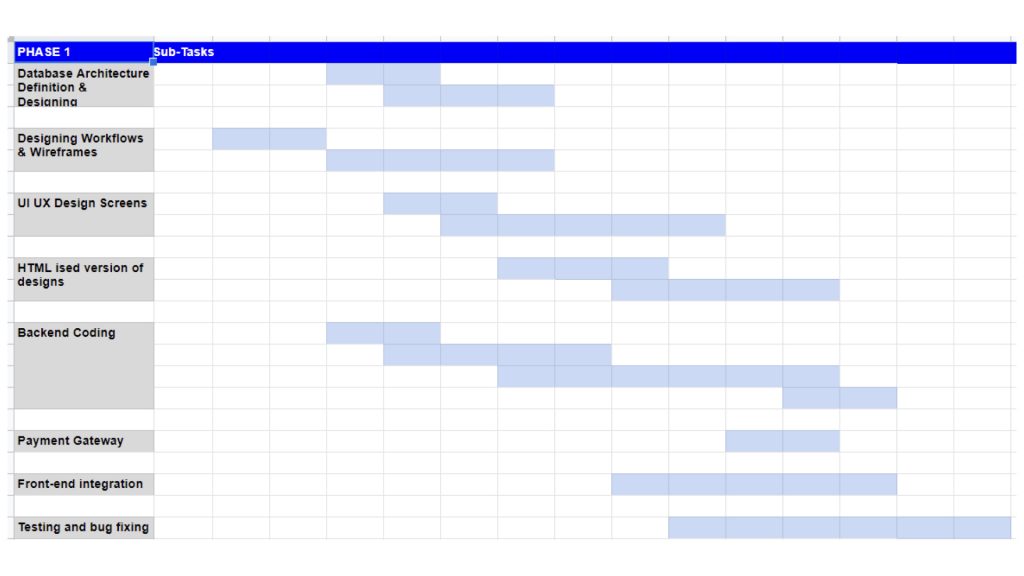
With the common clarity that emerges from the design process, engineers are able to structure the database tables, which act as the foundation for the product. Engineers then write the backend code which is hooked into the front end and brings the product to life.
The illustrative GANTT chart below provides an idea of how the Product development process flows through its lifecycle.
This the fourth part of our 4 part series. Read the other parts here –
- Paypal Mafia and Evolution of Techno Product Management
- The Art of Product Management – The Human Element
- The Process of Product Management – Discovery
- The Process of Product Management – Design
Author
-

Rantej Singh is the founder of eligere.ai. Rantej has 20 years of experience working with MNCs like Bank of America Merrill Lynch, Thomson Reuters and ICICI Bank in Trade Finance, Product and Innovation roles. Rantej is a serial entrepreneur with deep understanding of the digital product lifecycle ecosystem.
Rantej is a co-author of a finance book and a triple medal winner at US Open Karate Championship. Rantej has a Bachelor of Technology degree and is an MBA from IMD - Switzerland.

